Configure Zero Trust Network Access in Cloudflare Zero Trust
In this tutorial we will cover how to configure a Zero Trust Private Network in Cloudflare Zero Trust by combining device enrollment rules, Cloudflare Tunnels, and identity-based network policies.
🗺️ This tutorial covers how to:
- Create device enrollment rules and connect a device to Zero Trust
- Connect your private network server to Cloudflare’s edge using Cloudflare Tunnels
- Create identity-aware network policies
⏲️Time to complete:
45 minutes
Prerequisites
- A Zero Trust account setup
- The WARP client installed on a device and enrolled in a Zero Trust instance
- Admin access to server with Internet access
Device enrollment
To start, enroll your devices into the WARP client. The WARP client is responsible for forwarding your traffic to Cloudflare and eventually to your private network.
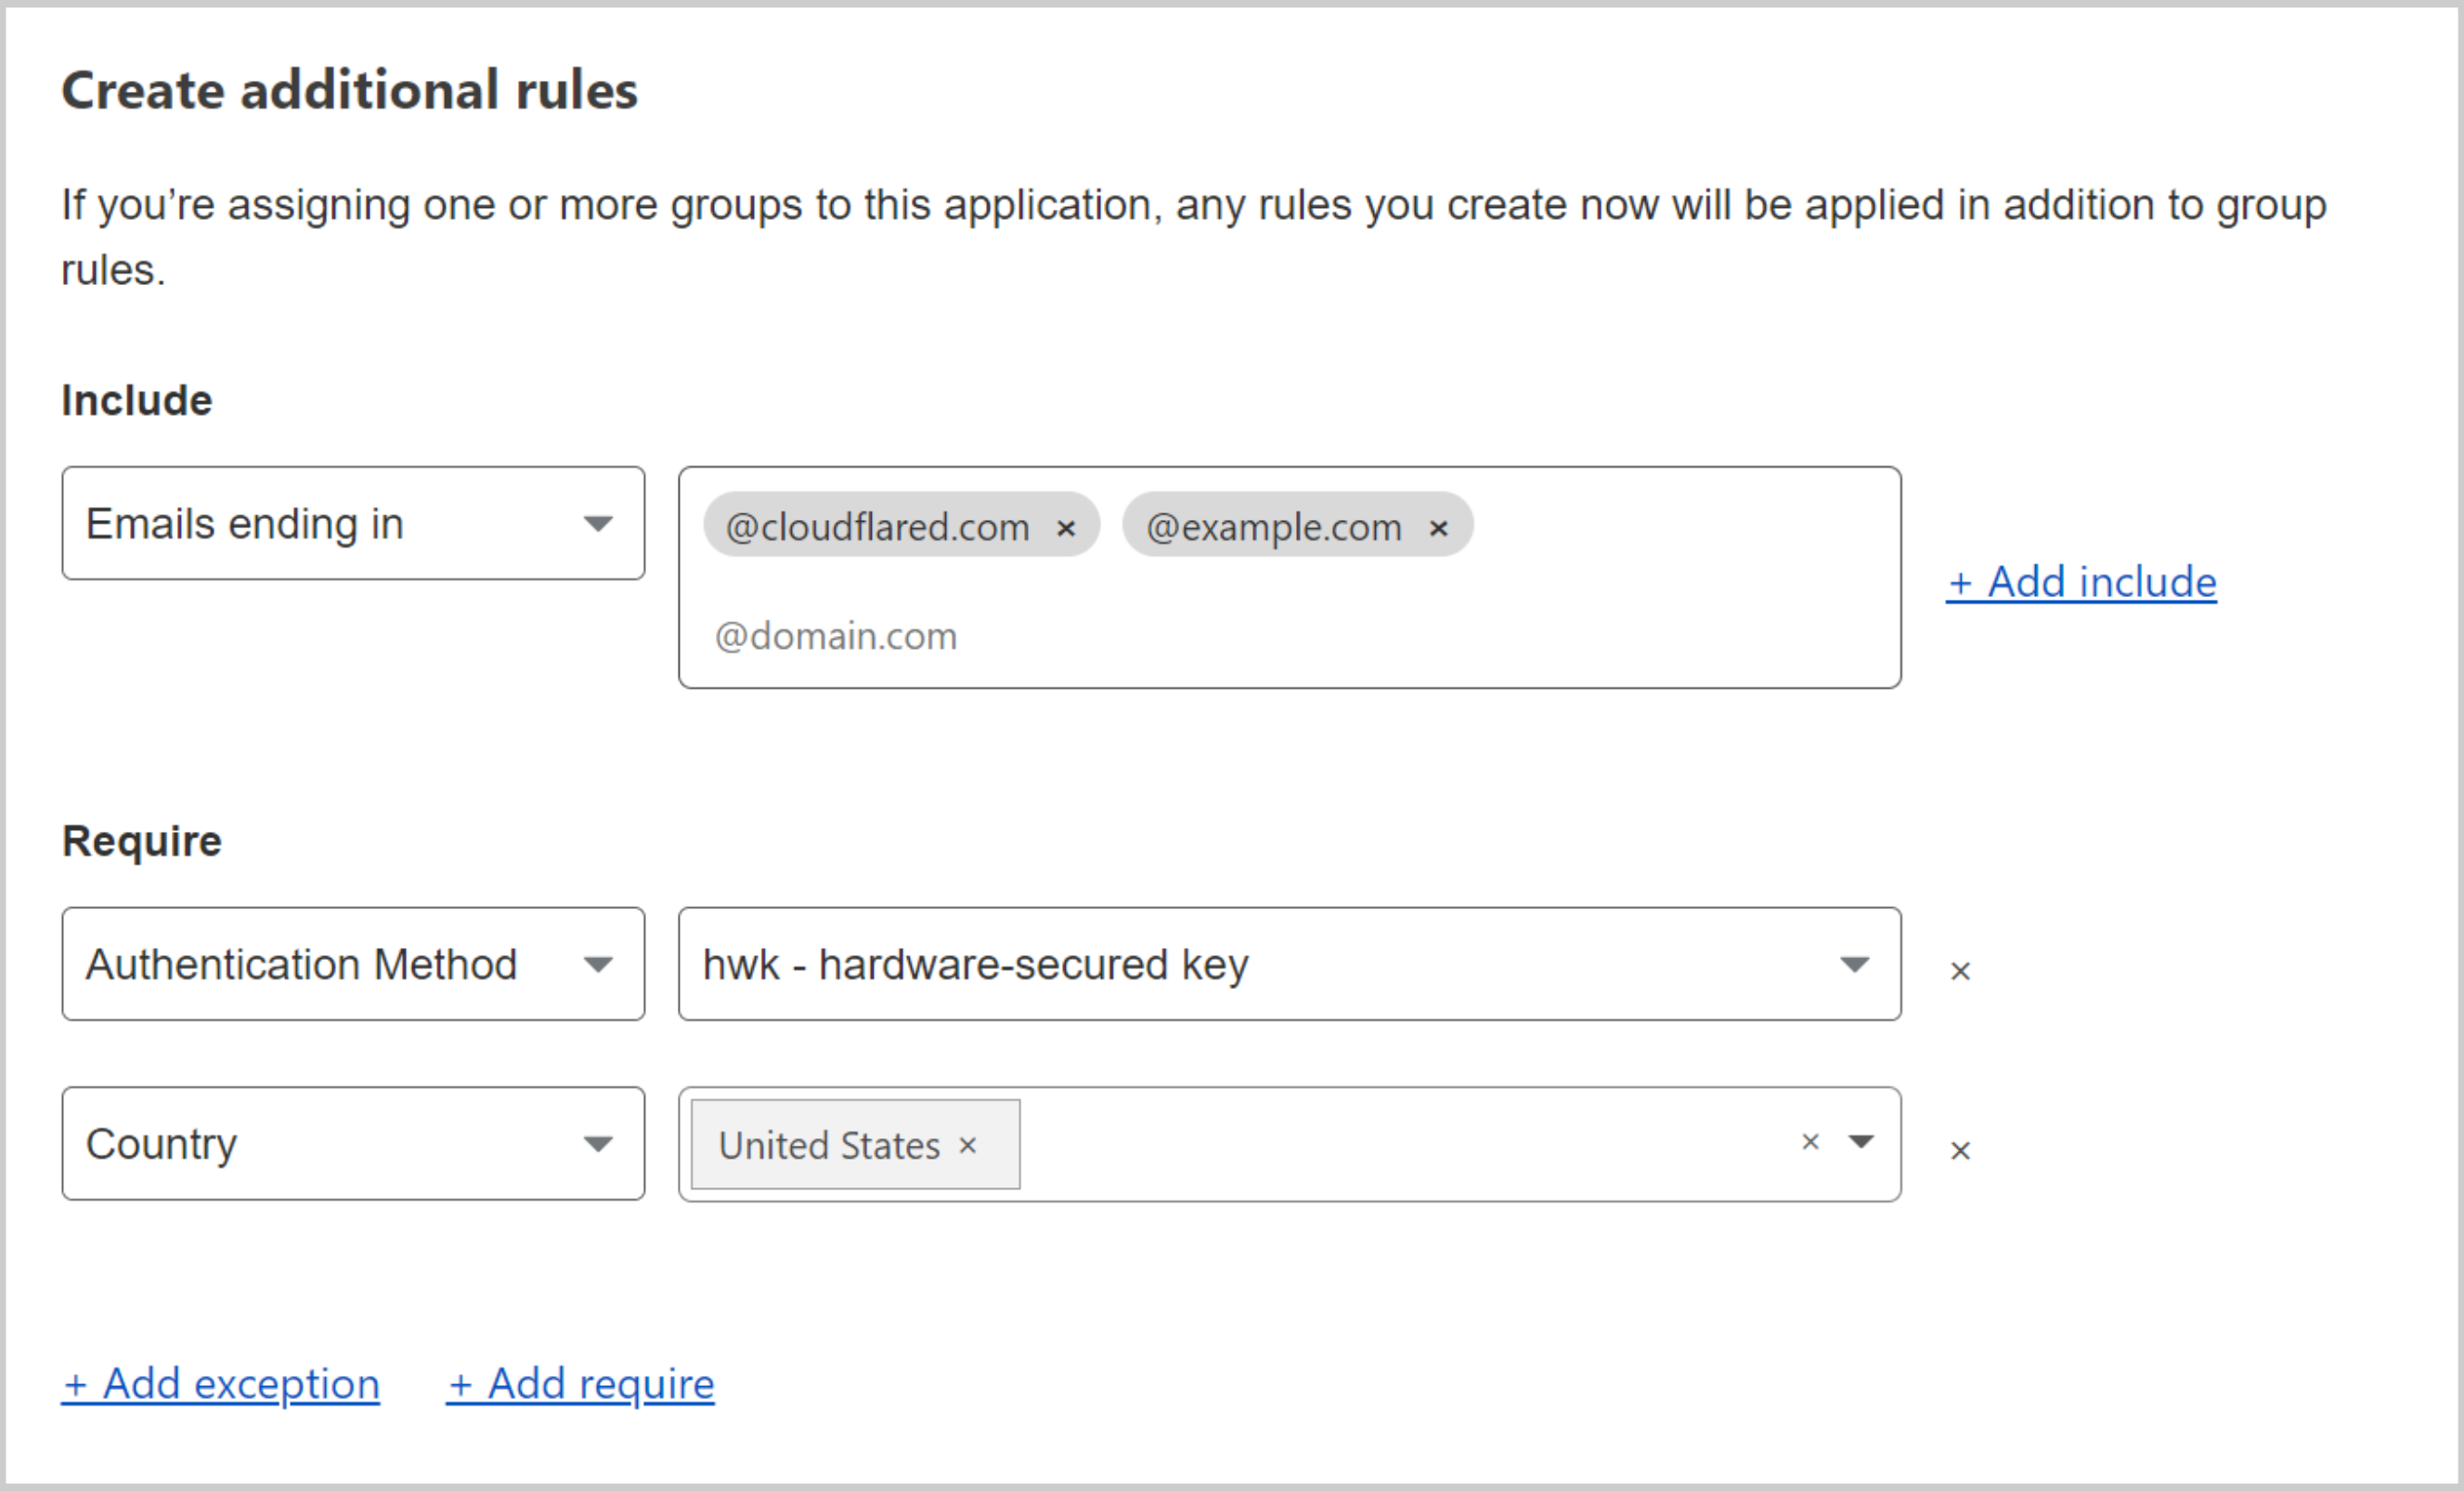
Define device enrollment rules under Settings > Devices > Device enrollment permissions > Manage.
In this example, we require that users have a hard key inserted and are connecting from the United States.
To enroll your device into your Zero Trust account, select the WARP client, and select Settings > Account > Login with Cloudflare Zero Trust.
To forward traffic to Cloudflare, enable the WARP client on the device.
Server configuration
Next, you will need to configure your private network server to connect to Cloudflare’s edge using Cloudflare Tunnel. This will establish a secure outbound connection to Cloudflare.
Identify the server you want to use to securely make your private network available to users. This can be the origin server directly, a jumphost, or load balancer.
If your server or network has a firewall, follow this guide to open up the correct ports and IP addresses. Only outbound openings are required. You do not need to open any inbound holes in your firewall.
Install
cloudflaredon the server.Authenticate
cloudflaredon the server by running the following command, then follow the prompt to authenticate via URL provided.$ cloudflared tunnel loginCreate a tunnel for the device:
$ cloudflared tunnel create <TUNNEL NAME>To find your tunnel ID, run
cloudflared tunnel list. Create a YAML config file for the tunnel with the following configuration:tunnel: <YOUR TUNNEL ID>credentials-file: /root/.cloudflared/<YOUR TUNNEL ID>.jsonwarp-routing:enabled: trueRun the tunnel:
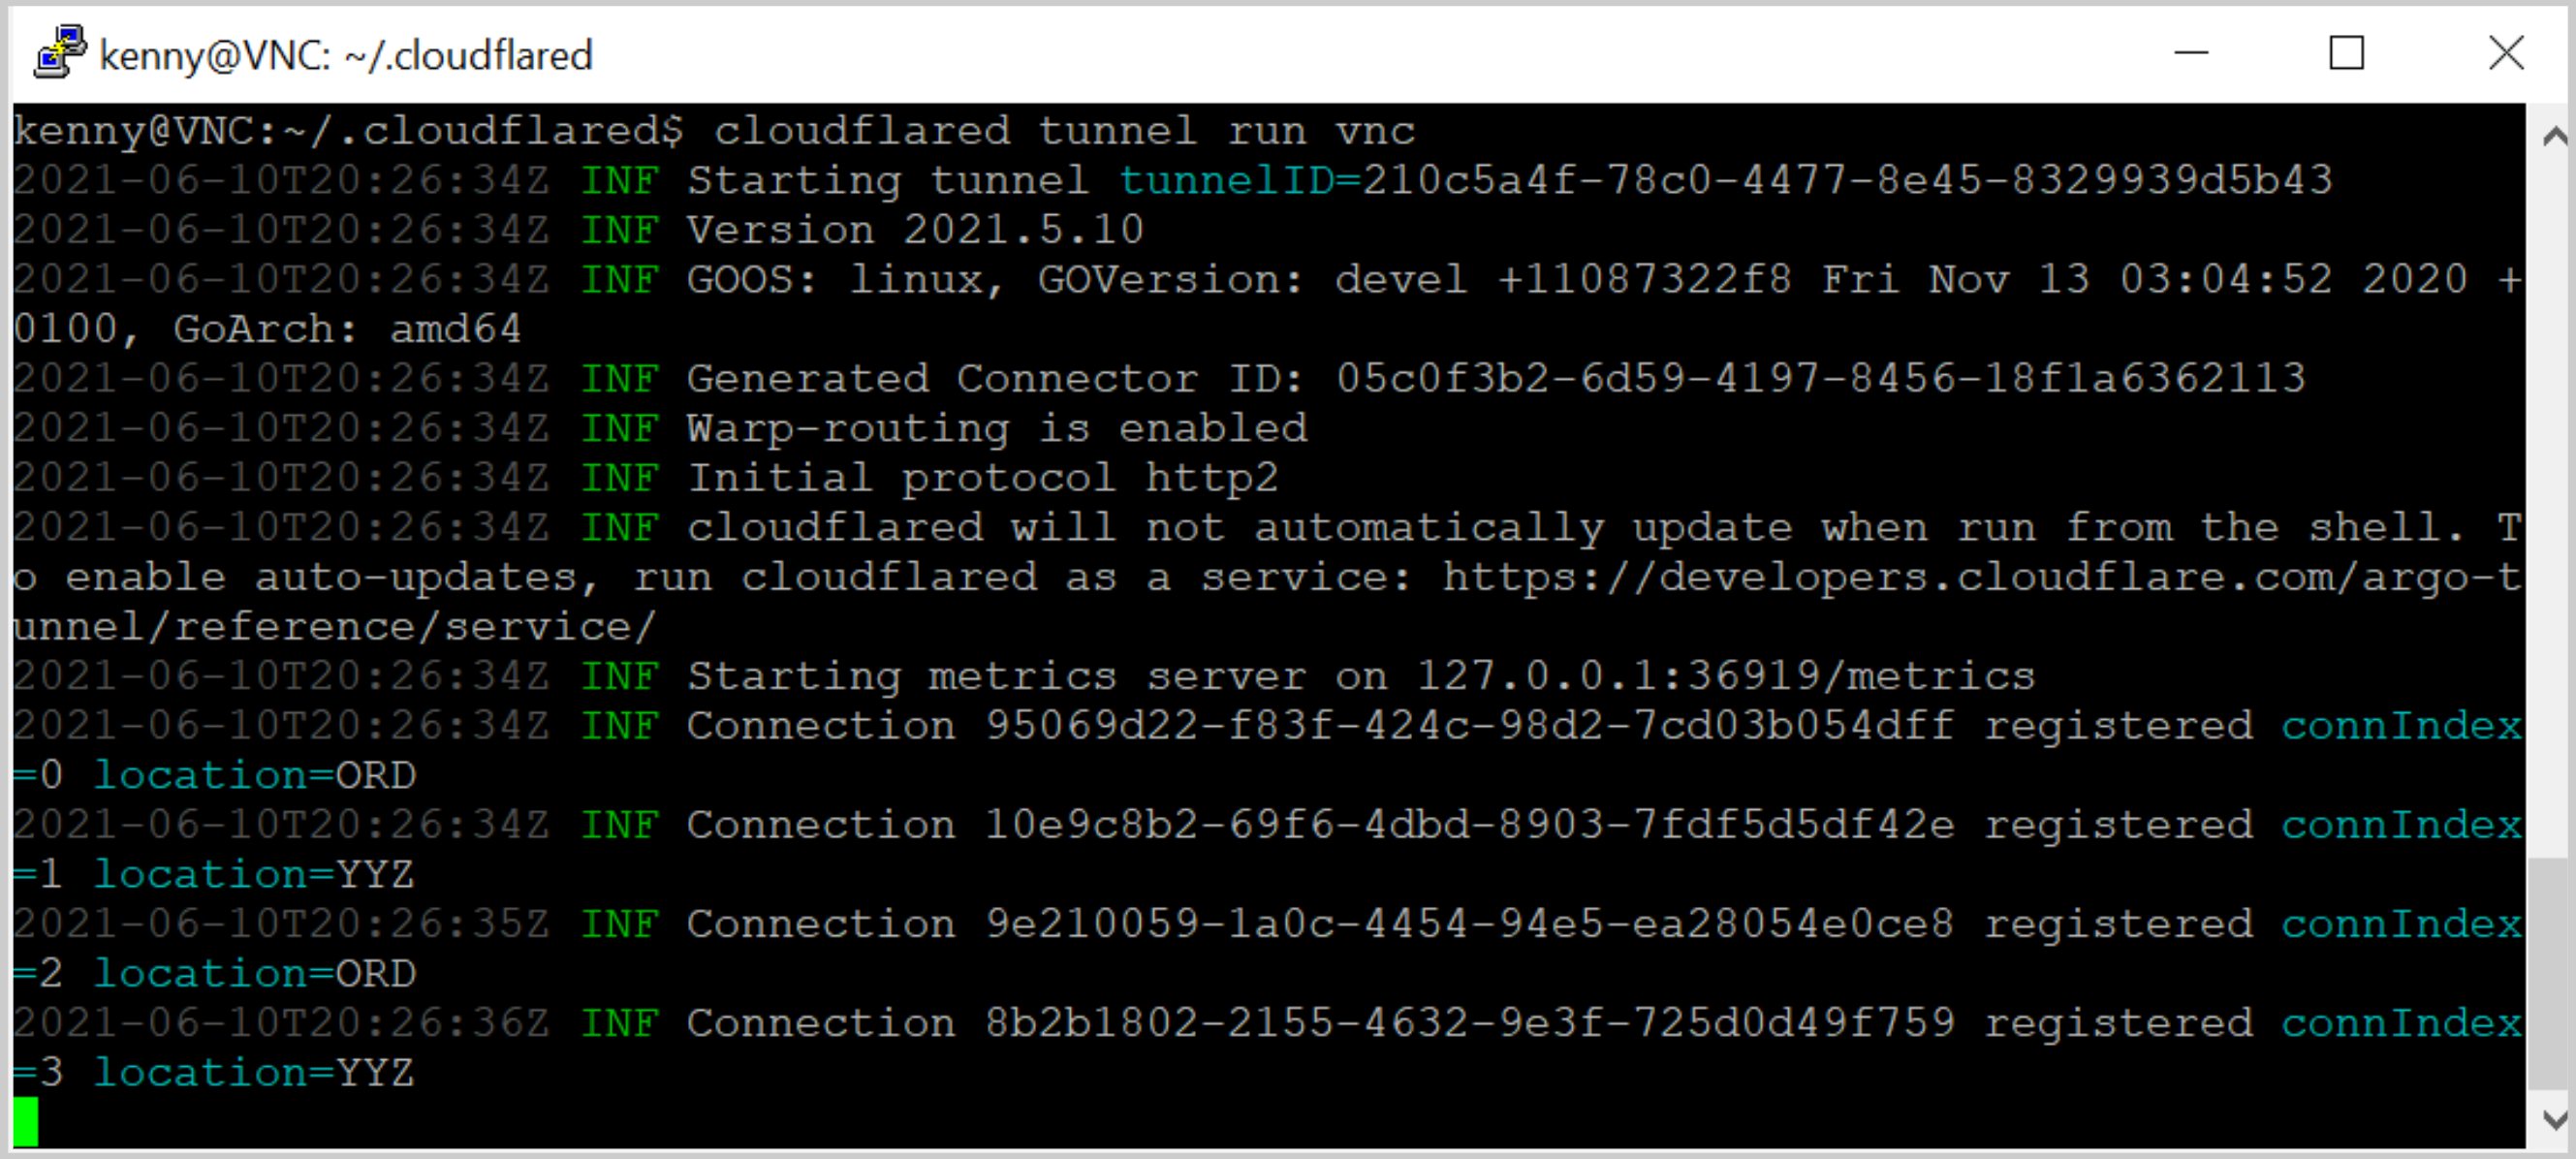
$ cloudflared tunnel run <TUNNEL NAME>
Network configuration
Finally, you will need to establish the private RFC 1918 IP address or range that you would like to advertise to Cloudflare, as well as set the identity policies determining which users can access that particular IP or range.
Route the private IP addresses of your server’s network to Cloudflare, where:
10.0.0.0/8is the IP or CIDR range of your server8e343b13-a087-48ea-825f-9783931ff2a5is your tunnel ID$ cloudflared tunnel route ip add 10.0.0.0/8 8e343b13-a087-48ea-825f-9783931ff2a5
Log in to your Zero Trust dashboard, select your account, and go to Gateway > Policies.
Create a network policy to allow traffic from specific users to reach that application. For example:
Selector Operator Value Action Destination IP in 10.0.0.0/8Allow User Email matches regex *@example.comCreate a second network policy to block all traffic to the IP range that was routed. For example:
Selector Operator Value Action Destination IP in 10.0.0.0/8Block To verify you do not have the desired target private IP range in the Split Tunnel configuration menu, go to Settings > Network > Split Tunnels.
Your setup is now complete. For more in-depth information on how identity-aware network policies work, read our dedicated documentation page.